From our friends at Thermador! Some advice from interior designer Bria Hammel on how to create a mood board as a start to your next home design project!
On this month’s Behind the Design, we speak with Bria Hammel about how to create a mood board. Bria is the Principal Designer and CEO of Bria Hammel Interiors, a full-service interior design studio based in Mendota Heights, Minnesota. I am a huge fan of Bria’s work and I’m always keeping an eye on her Instagram where she features the most stunning projects. We are so proud to have her on our Thermador Design Council!
Bria walks us through how to create a mood board like a professional. Whether you’re interested in mixing up your current space, or doing a full-blown renovation, her tips and tricks will help you execute your vision from start to finish.
1. Hi, Bria! Can you tell us a little bit about yourself and your work?
Hi! I am the Principal Designer and CEO of Bria Hammel Interiors! All our projects are client-driven but we specialize in traditional design with a fresh twist. Our talented team of women are dedicated to designing stunning, inviting homes for our clients. One of the greatest joys that comes from being an interior designer is designing homes that are as unique and beautiful as the clients that we work with. I want our clients’ homes to feel like the absolute best versions of themselves and a place where they feel happy and at peace the second they walk through their door.
2. What is the first thing someone should do before beginning their mood board? Why is this a great tool for designing a space?
For our clients, the first thing we do before even beginning to put together a mood board is create the design narrative. This easy exercise is where we establish the project’s concept words (i.e. inviting, textural, classic, etc.), overall aesthetic, and goals. Having a unified narrative that our design team, collaborators, and our clients all agree on ensures that everyone is aligned with the same direction from the get-go.


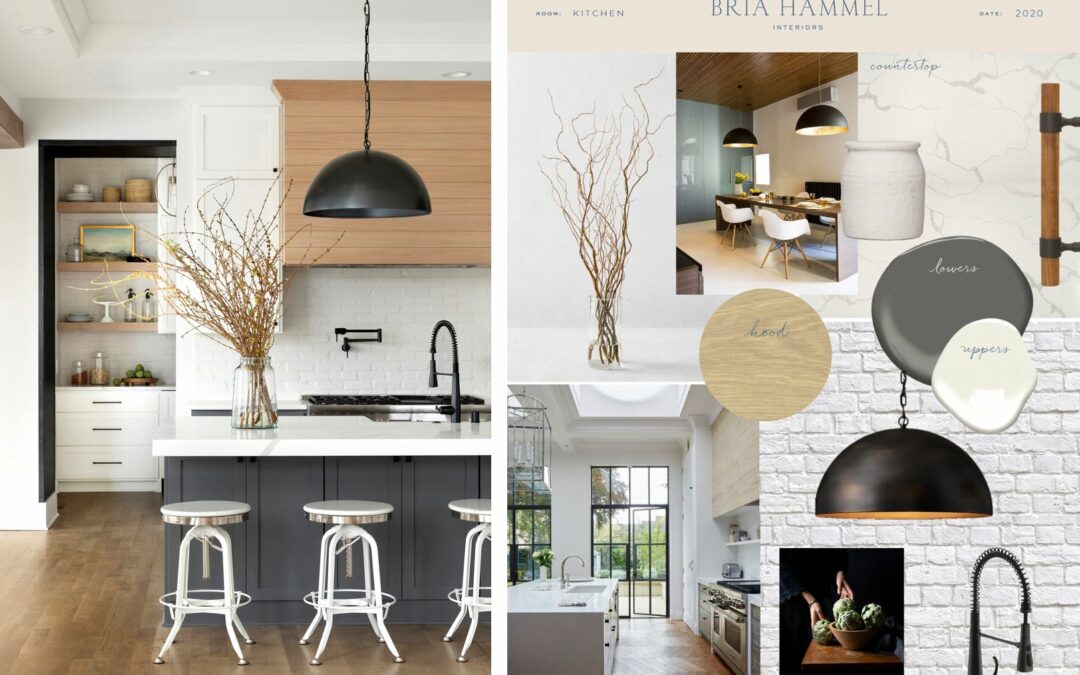
4. Where do you gather inspiration for your mood board? Can you walk us through the steps?
All our projects are client-driven — we take our clients’ wants, needs, vision, and style and bring it all to life. So, when we’re gathering inspiration, it can come from a variety of places! Perhaps it’s an antique furniture piece we discovered during one of our travels, a beautiful local restaurant we love dining at, an article of clothing we found in a boutique, or, of course, the endless amount of inspiring interior photography and work the design community executes. Typically, we are drawn to photos, details, color palettes, and textures that evoke emotion or a mood. So, we put together a mood board that has the perfect balance of that while also breaking it down as much as possible for our clients as to how we’re going to translate that for their project.

5. What is a common mistake people make when creating a mood board for the first time?
Trying to fit everything on one page! The reason why designers are so great at what they do is that they can visualize how it all will come together and what the final product will look like! However, it’s our job to break it down for our clients and help them digest it all –which can sometimes be a lot depending on how large their project is!
So, get as detailed as possible. If there are specific notes and things you want to point out in the design, write those out for your clients to remember. In larger spaces, it’s fine to break one room into 1-2 pages. Having everything crammed into one page can make your design feel cluttered and overwhelming –even if it’s far from it!

6. How do you help clients create a cohesive space and color scheme? Any tips on deciding what to include and what to remove—how do you know what will really work in the space?
When we are putting a color scheme together, we first want to understand the energy of the space. If we want the room to feel calm, we might use a cooler palette, if we want more energetic spaces for entertaining, we’ll go with warmer tones. Simply understanding the function of the space can help determine the color palette.
When working with colors, we like to suggest choosing 3-5 colors max for your color scheme. If you use more than that, it makes the space feel overwhelming and busy. Narrowing it down to two or three main colors you want to see in a space will help select those few supplemental colors to make the space feel cohesive.

7. Do you have any fun tips & tricks for creating a mood board? Any hacks you’re willing to share?
The images you use in your mood board don’t have to be taken so literally! It could be a feeling that an image gives you whether it’s relating to the color palette you like or thinking about textures –really looking at the images overall and setting the vibe and feel.
Another tip is, when creating, don’t be afraid to add as many images as you’d like to your board! You can always edit later down. I always like to add a lot of things and then pull out the ones that I love the most at the end and create the most cohesive design.

For more exceptional design, find inspiration on Bria Hammel’s Instagram: https://www.instagram.com/briahammelinteriors
Read the original Thermador blog post here!