Original link: https://www.electrolux.com/en/live-love-lux/how-to-host-an-ice-cream-topping-bar/
This year, we felt like planning something a little different for our holiday celebration – and looked to the crisp, cold weather for inspiration. Enter: ICE CREAM!
Nothing is a bigger crowd pleaser than this sweet treat, so we thought: Why not make it the center of attention at this year’s fete?
We got right to work on creating the perfect, creamy homemade ice-cream – which focused on rich, fresh vanilla bean, while adding warmth and softness with a couple of generous pinches of fleur de sel. Once we had that figured out, the fun really began!
While we wanted this party to be fun, we also wanted to keep it super chic with a twist, so we set out to find the most delicious (and unexpected!) topping to pair with our homemade classic.
Simply follow these steps to create the perfect DIY Ice Cream Bar to the delight of all of your guests!
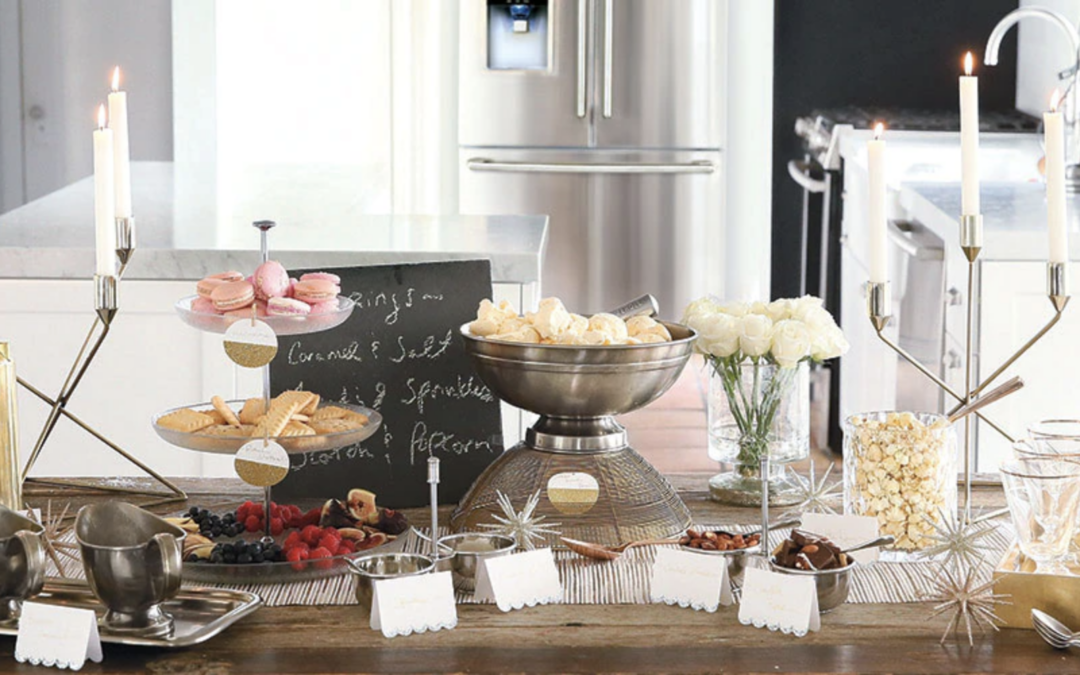
1. THE SET-UP
Starting with a blank slate, add the following to the your table:
Create your ice cream centerpiece, using a generously sized serving bowl.
Arrange your topping vessels into groups, making sure to mix heights and sizes to keep the layout interesting. We broke our bar into the following groups: liquid toppings, classic toppings, and festive toppings.
Make sure you don’t have your ice cream melting or your caramel sauces cooling by adding dry ice to the bottom of the ice cream bowl, and using mini candle or kerosene heaters at the bottom of anything that needs to be kept warm.
2. THE TREATS
We love mixing unexpected tastes to create a unique, memorable Sunday – so get creative!
We ended up choosing:
hot espresso
scotch
bourbon caramel sauce
fleur de sel
festive sprinkles
shortbread cookies
crushed candied almonds
kettle popcorn
macarons
tray of sliced fruit
white & dark chocolate bark
3. THE FINISHING TOUCHES
We added name cards to each vessel and created a ‘toppings suggestion’ menu board – scotch & pepper, fleur de sel & bourbon caramel sauce – to encourage guests to be as creative as possible!
Finally, we finished the table with some glittery silver and gold ornaments to really polish the look.
Let the festivities begin!
Live.Love.Lux Tip: Keep your ice cream frozen but still soft for serving with the Soft Freeze Bin in your Electrolux French Door Refrigerator.
Homemade Vanilla Bean & Fleur de Sel Ice Cream
Ingredients
1 cup whole milk
2 pinches fleur de sel
3/4 cup sugar
1 vanilla bean
2 cups heavy cream
5 large egg yolks
1 teaspoon vanilla extract
Instructions
Freeze your baking dish well in advance. Then, heat 1 cup whole milk. Add 2 pinches of fleur de sel and
3/4 cup sugar in a saucepan. Scrape the seeds from 1 vanilla bean into the milk, and then add the bean pod to the milk. Cover and remove from heat, allowing the mixture to infuse for one hour.
Meanwhile, over a strainer, pour 2 cups heavy cream into an ice bath. In a separate bowl, stir together the 5 large egg yolks. Rewarm the milk then slowly pour 1/2 of the milk into the yolks, whisking constantly.
Scrape the warmed yolks and milk back into the saucepan. Cook over low heat, stirring constantly, until the custard thickens. Strain into the heavy cream and stir over the ice until cool. Add 1 tsp pure vanilla extract and refrigerate to chill thoroughly for a minimum of 4 hours. Remove the vanilla bean and pour mixture into cold baking dish (from the freezer).
Freeze for 45 minutes. Blend with immersion blender and repeat every 30 minutes for 2 – 3 hours, until the ice cream has the desired consistency.